Desktop Survival Guide
by Graham Williams


|
DATA MINING
Desktop Survival Guide by Graham Williams |

|
|||
Getting Started with odfWeave |
The odfWeave package will process an odt document (as saved from OpenOffice.org Writer) to find sections of the document appropriately marked as R commands. These R commands are run and their output is inserted in place of the special markup.
R commands can be embedded within the text of the document by
marking them with \Sexpr. Including the string
\Sexpr{Sys.time()} in your document will result in a
time stamp after the document has been processed by
odfWeave.
As a simple exercise we can create a small OpenOffice.org document, insert some simple R commands and process it with odfWeave.
To begin, start OpenOffice.org Writer and insert the following text (a
copy and paste should be sufficient to copy this text into the
OpenOffice.org document):
|
Save the file (e.g., as example01_in.odt). Now start R to obtain the R prompt so that we can process the file. We will issue the commands listed below. The install.packages command is only required if we don't already have odfWeave installed. Load the odfWeave package with the library command and then use the odfWeave function to process the odt file to produce example01.odt.
> install.packages("odfWeave")
|
> library(odfWeave)
> odfWeave("example01_in.odt", "example01.odt")
|
Copying example01_in.odt Setting wd to /tmp/RtmpdWA9wp/odfWeave22213527957 Unzipping ODF file using unzip -o example01_in.odt Removing example01_in.odt Creating a Pictures directory Pre-processing the contents Sweaving content.Rnw Writing to file content_1.xml Processing code chunks ... 'content_1.xml' has been Sweaved Removing content.xml Post-processing the contents Removing content.Rnw Removing styles.xml Renaming styles_2.xml to styles.xml Removing extra files Packaging file using zip -r example01_in.odt . Copying example01_in.odt Resetting wd Removing /tmp/RtmpdWA9wp/odfWeave22213527957 Done |
When we open example01.odt with OpenOffice.org Writer we will see that the R commands have been replaced with the output of the commands.
We can format our document (fonts, styles, etc) prior to processing
the document with odfWeave. If the \Sexpr command
is typeset with a particular font then that will be retained after
processing.
When we open the processed document in OpenOffice.org we will see
something like the following. Note that the original document has
embedded carriage returns that enforce a line break in the processed
document. This is for illustrative purposes.
|
We also can include blocks of R code within the original document. The R commands themselves together with their output will be included in the processed document.
Code blocks begin with a line that begins with <<, followed by
a label, used to identify this code block. The line is terminated with
>>=. Any number of lines of R code can then follow. The code
block ends with a line beginning with @.
To illustrate the process, paste the following example into an
OpenOffice.org document and save the document as
example02_in.odt. Within OpenOffice.org select/highlight the
three lines that represent the code block and change their format to
use, for example, a fixed width courier font.
|
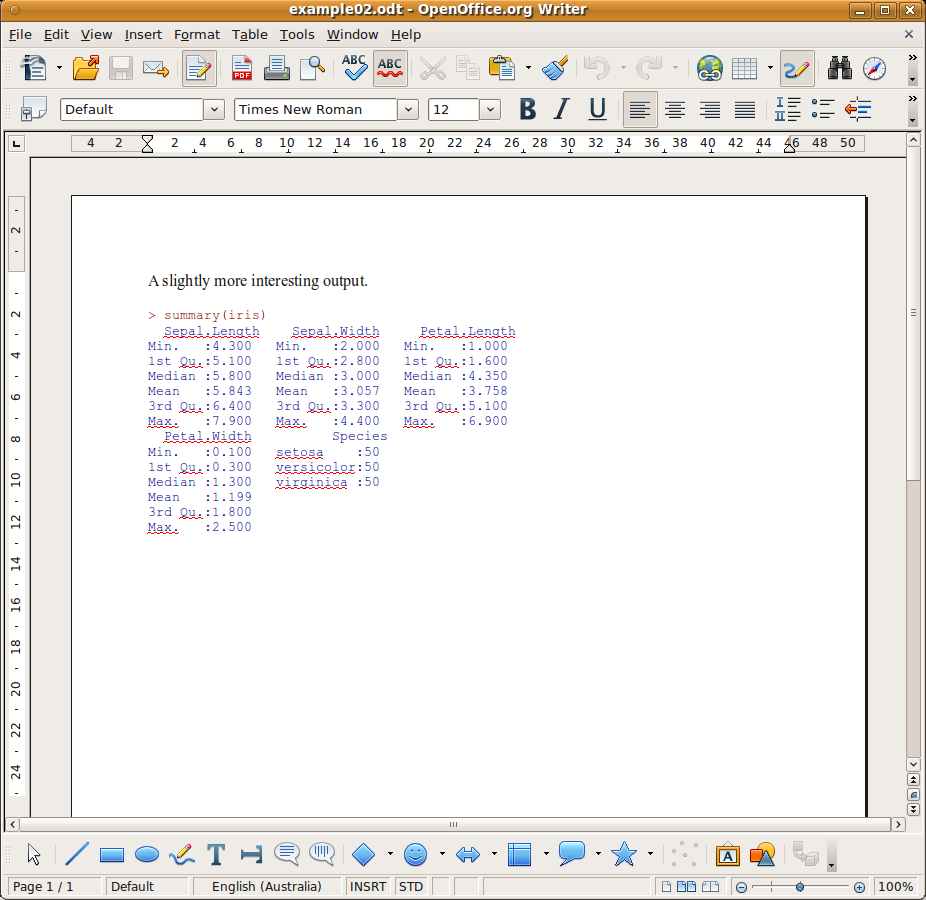
Process the document with odfWeave in a similar fashion to that above for example01. Here we see the sequence of actions performed by odfWeave to process the document.
> odfWeave("example02_in.odt", "example02.odt")
|
  Copying  example02_in.odt
  Setting wd to  /tmp/RtmpdWA9wp/odfWeave22213527453
  Unzipping ODF file using unzip -o example02_in.odt

  Removing  example02_in.odt
  Creating a Pictures directory

  Pre-processing the contents
  Sweaving  content.Rnw

  Writing to file content_1.xml
  Processing code chunks ...
    1 : echo term verbatim(label=sample1)

  'content_1.xml' has been Sweaved

  Removing content.xml

  Post-processing the contents
  Removing content.Rnw
  Removing styles.xml
  Renaming styles_2.xml to styles.xml
  Removing extra files

  Packaging file using zip -r example02_in.odt .
  Copying  example02_in.odt
  Resetting wd
  Removing  /tmp/RtmpdWA9wp/odfWeave22213527453

  Done
|
Todo: This section should not show the output - comment on the output of the first example.
The most interesting part will be the Processing code chunks ... section, which lists each code chunk within the source file and records the processing being performed.
Eventually, this will produce the formatted document we see in Figure 39.1.
 |
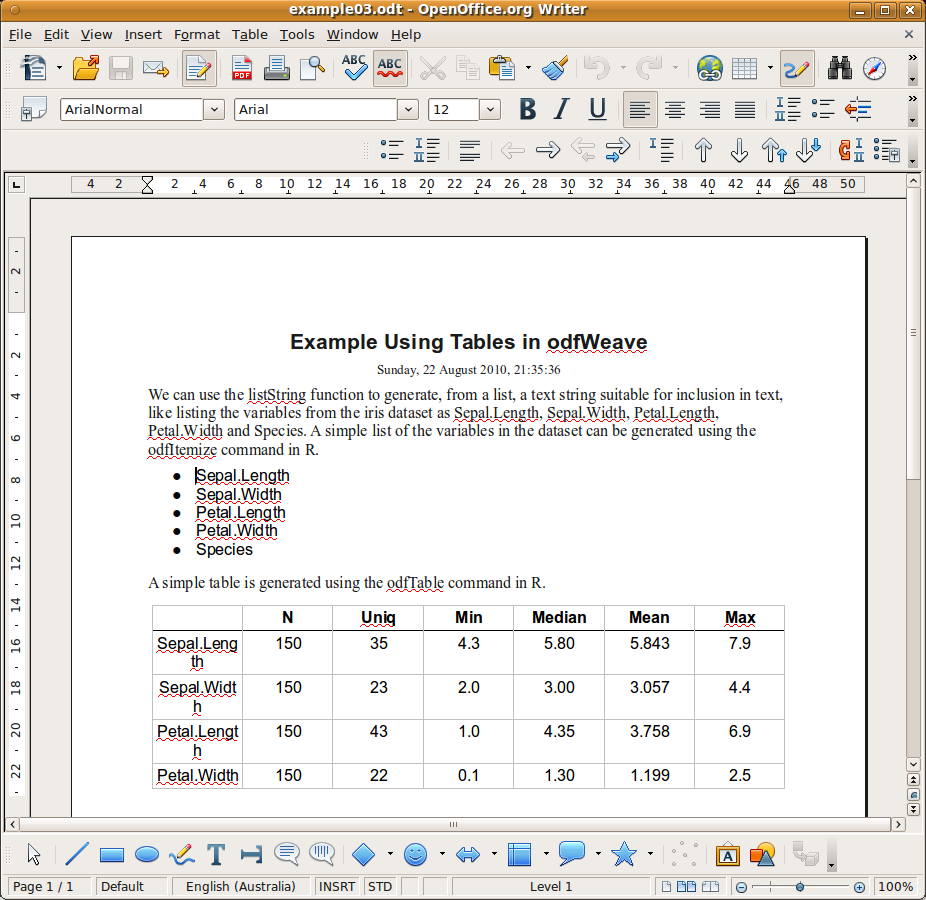
We can generate formatted lists and tables from R using the odfItemize and odfTable functions. The list and table in Figure... are produced with:
> odfItemize(names(iris)) > odfTable(data.frame( N=sapply(iris[1:4], length), Uniq=sapply(iris[1:4], function(x) length(unique(x))), Min=sapply(iris[1:4], min), Median=sapply(iris[1:4], median), Mean=sapply(iris[1:4], mean), Max=sapply(iris[1:4], max))) |
Todo: Fix format of both sections to be 10 point. Maybe need to talk about the style options of odfWeave.
Todo: Would asking OO.o to export to PDF and then include a page of the PDF look better?
 |
Todo: Add example of including plot.
Copyright © Togaware Pty Ltd Support further development through the purchase of the PDF version of the book.